There’s something almost magical about pulling a loaf of bread with a chocolate swirl out of the oven. The smell alone is enough to stop everyone in their tracks. It looks impressive, tastes incredible, and honestly, it’s not as complicated as it seems. Whether you’re an experienced home baker or just getting started, this guide walks you through everything you need to know.
What Makes a Chocolate Swirl Bread So Special?
Most breads are delicious on their own. But when you add a rich chocolate ribbon running through soft, pillowy dough, you get something that works as breakfast, dessert, or an afternoon snack. The contrast between the slightly sweet bread and the deep, bittersweet chocolate is what makes every slice so satisfying.
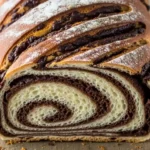
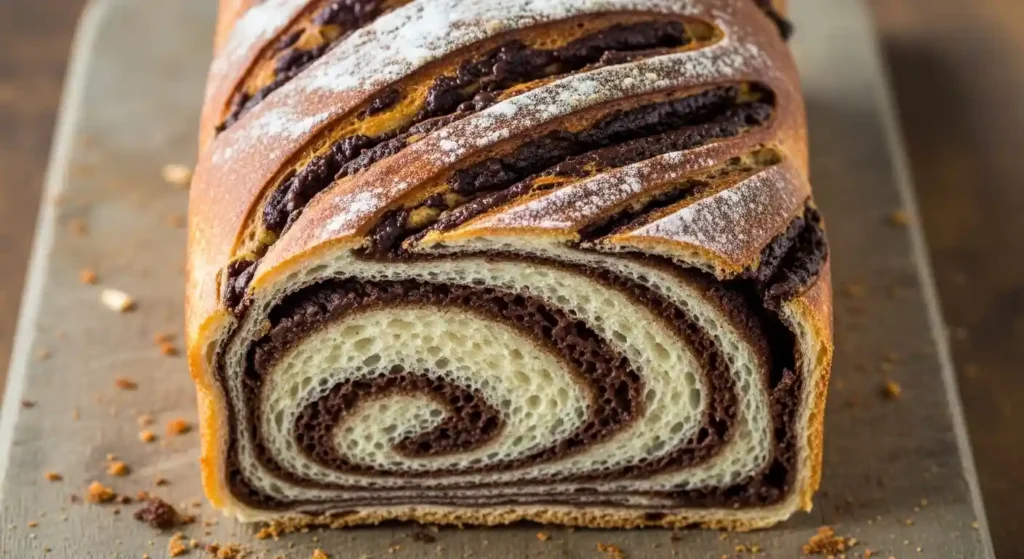
It also looks stunning when sliced. That tight spiral pattern makes it a showstopper on any table.
The Basic Ingredients You’ll Need
You don’t need anything exotic. Most of these are already in your kitchen:
- 3 cups all-purpose flour (or bread flour for a chewier texture)
- 2¼ tsp active dry yeast
- 1 tbsp sugar
- 1 tsp salt
- 1 cup warm milk
- 2 tbsp unsalted butter, softened
- 1 egg
For the chocolate filling:
- 3 tbsp cocoa powder
- 3 tbsp sugar
- 1 tbsp melted butter
- 1 tsp cinnamon (optional but recommended)
- A pinch of espresso powder to intensify the chocolate flavor
How to Make a Loaf of Bread with a Chocolate Swirl
Step 1: Make the Dough
Start by activating your yeast. Mix it with warm milk and sugar and let it sit for about 10 minutes until it gets foamy. If it doesn’t foam, your yeast might be expired — toss it and start fresh.
Once the yeast is active, combine it with flour, salt, butter, and egg. Knead the dough for 8–10 minutes until it’s smooth and elastic. It should spring back when you poke it gently.
Place the dough in a lightly oiled bowl, cover it with a damp towel, and let it rise in a warm spot for about 1 to 1.5 hours, or until it doubles in size.
Step 2: Prepare the Chocolate Filling
While the dough rises, mix together the cocoa powder, sugar, melted butter, and cinnamon. You want a thick, spreadable paste — not too wet, not too dry. If it feels too dry, add just a tiny splash of milk. Too wet and it’ll leak out during baking.
Step 3: Shape the Swirl
Once the dough has doubled, punch it down gently and roll it out into a rectangle, roughly 12 by 9 inches. Spread the chocolate filling evenly across the surface, leaving about half an inch at the edges.
Roll the dough tightly from one of the shorter ends, like a cinnamon roll log. Pinch the seam closed, then place it seam-side down into a greased 9×5 loaf pan.
Step 4: Second Rise and Baking
Cover the loaf and let it rise again for 45 minutes to an hour. It should peek above the rim of the pan.
Preheat your oven to 350°F (175°C). Brush the top with a little egg wash for that beautiful golden crust. Bake for 30–35 minutes. The loaf is done when it sounds hollow when you tap the bottom and registers around 190°F internally.
Let it cool for at least 20 minutes before slicing. As tempting as it is, cutting too early will squish the crumb and mess up that gorgeous swirl.
Battlefield Cheats: What They Are and Do They Work?
Pros and Cons of Baking Chocolate Swirl Bread at Home
Pros:
- Full control over ingredients — no preservatives or artificial flavors
- Customizable filling (add nuts, dried cherries, or more chocolate)
- Costs far less than bakery versions
- Incredibly satisfying to make and share
- Works fresh or toasted the next day
Cons:
- Takes 2.5 to 3 hours start to finish (mostly waiting for dough to rise)
- The swirl can unravel if the dough isn’t rolled tightly enough
- Overfilling leads to leaking chocolate and a soggy bottom
- Requires practice to get the swirl uniform and tight
Common Mistakes to Avoid
Even experienced bakers run into trouble with this one. Here’s what typically goes wrong:
Using milk that’s too hot. It kills the yeast. Warm means around 110°F — it should feel like a comfortable bath, not hot.
Skipping the second rise. That second proof is what gives the bread its light, airy texture. Rushing it makes the final loaf dense.
Spreading filling too close to the edges. Leave that border. Otherwise the chocolate spills out when you roll, making the loaf sticky and hard to seal.
Slicing while hot. The interior is still setting as the loaf cools. Give it time. Twenty to thirty minutes minimum.
Not greasing the pan properly. Use butter or a non-stick spray and don’t skip it. Nothing worse than a beautiful loaf stuck to the pan.
Best Practices for a Perfect Swirl Every Time
A few habits make a real difference with this bread:
- Use room temperature butter in both the dough and filling. Cold butter creates lumps; room temp butter blends smoothly.
- Roll the dough evenly. An uneven rectangle leads to an uneven swirl. Take your time.
- Chill the filling slightly before spreading if your kitchen is warm. A firmer filling holds its shape better during rolling.
- Use a sharp serrated knife to slice. A dull blade will drag and flatten the swirl.
- Store it wrapped at room temperature for up to 3 days, or freeze slices individually for up to a month.
Fun Variations Worth Trying
Once you’re comfortable with the base recipe, there’s plenty of room to experiment.
Nutella swirl — Swap the cocoa paste for a thin layer of Nutella. Rich, hazelnut-forward, and always a crowd-pleaser.
Dark chocolate and orange — Add a teaspoon of orange zest to the filling. The citrus cuts through the richness beautifully.
Chocolate and sea salt — Sprinkle flaky sea salt over the filling before rolling. That sweet-salty combo is seriously addictive.
Double chocolate — Use chocolate milk in the dough itself and a dark cocoa filling. For the chocolate lovers who don’t do anything halfway.
Conclusion
Baking a loaf of bread with a chocolate swirl is one of those projects that feels ambitious but delivers on every front. The process is straightforward once you understand the basics, and the result is a bread that genuinely impresses. Take your time with the rises, be careful with the filling, roll it tight, and you’ll have a bakery-quality loaf right from your own oven. Make it once, and it’ll become a regular request in your house.
FAQs
1. Can I use instant yeast instead of active dry yeast?
Yes. Use the same amount and skip the activation step — just mix it directly into the dry ingredients. The rise times may be slightly shorter.
2. Why did my chocolate filling leak out during baking?
Most likely the filling was too wet or spread too close to the edges. Keep it thick and leave a half-inch border when spreading.
3. Can I make the dough the night before?
Absolutely. After the first rise, shape the loaf, cover it tightly, and refrigerate overnight. Let it come to room temperature and complete the second rise before baking.
4. What type of cocoa powder works best?
Dutch-processed cocoa gives a deeper, smoother chocolate flavor. Natural cocoa works too and has a slightly more intense, acidic bite. Either is fine.
5. How do I keep the swirl from disappearing when baked?
Roll the dough as tightly as possible and use a thick enough filling. A thin filling tends to melt into the dough rather than staying as a visible ribbon.